Crestholm Channels
Crestholm Channels is a Dungeon
Strategy Guide
Crestholm Channels is a bit of a mess of a dungeon at first glance, but after you get some time to collect your bearings, you should be fine. Just keep in mind that anywhere below level 45 is doable to some degree, it’s best to be up-to par with the level gap this time around, I feel.
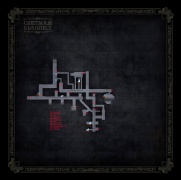
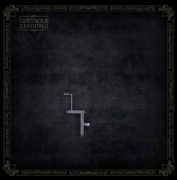
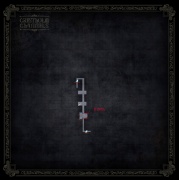
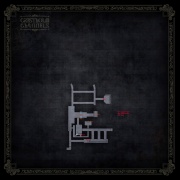
To begin with, you’re going to want to head towards the two check marks that are placed on the map to activate some controls on a machine that you’re going to want to activate before too long. After you get the first 2 machines sorted, head towards what looks like four narrow pipes, of which can be located towards the middle of the map. Look for the third pipe from the left and you should come across a set of stairs on the map and it will lead you to the next area, as well as the next machine. Head down the hall until you come across a drop; be sure to kick down the ladder and climb down to the next floor.
Move towards the south end of your mini-map and you’ll come across the next machine that you’re going to want to activate. Just be careful, due to all of the monsters and enemies that are lying in wait, it’s best to take care of them first and foremost before you activate the next machine. Once you’re done in this area, head back to where you entered on this floor and look for something that resembles a slide and enjoy the trip down into the pit!
Before too long you’ll encounter what seems to a boss, but is in actual fact just a mini-boss. The mini-boss isn’t too difficult, but it can do some substantial damage to you in one fell swoop. Oh, and to make matters just that little bit worse you’re going to have to contend with it turning you into a toad if you fail to time your dodges properly, so do keep that in mind.
After you defeat the boss you will come across a bunch of ladders you’re going to want to scale each time until you get to the very top and are required to cross (slowly) over a pipe to reach the next machine. Don’t fall off the pipe – you will die!
Soon enough, you will enter a fairly spacious room and encounter a large, green door – the one piece of equipment that is making Noctis activate all these machines to progress. Thankfully, there’s only the one more machine left to activate and it’s not all that far from here.
Nearby you will find a couple of ladders that you’re going to want to climb and just before you climb on the second one you will have a Black Flan to contend with.
One last ladder will take you to the final machine and will open that green door we’ve just encountered. After activating the final machine, head back down to the big, green door in whatever way you please and be prepared for the real boss fight of this dungeon.
Now that the door is out of the way, slide down the passage and come face-to-face with the level 50 Jormungand. A lot of his attacks involve the use of fire, so some fire resistance definitely will help out if you’re not quite up-to snuff for this fight. Similar to the mini-boss you fought, there’s going to be a number of sweeping attacks, but they’re all fairly easy to avoid with some decently timed dodges. As a result, before too long the beast will be defeated and you can finally consider this dungeon/maze a blinding success!
Map
- See also: Crestholm Channels Map
Crestholm Channels (Lvl 92)
- See also: Crestholm Channels (Menace)
Crestholm Channels (Menace) is a Level 92 Menace Dungeon locked behind the vault in Crestholm Channels.
Guide
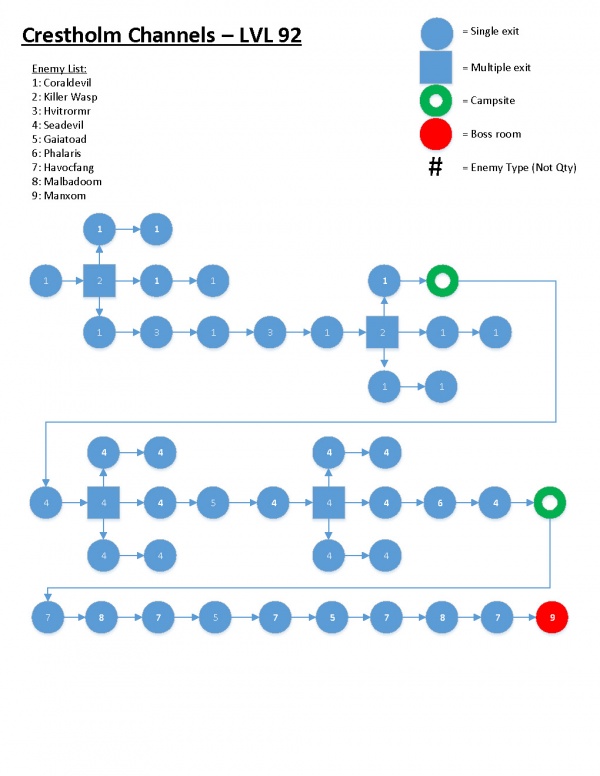
Easily one of the more high level secret dungeons in your quest; for this one it’s for the best that you be around level 90-92, just in case things start to pile on top of you and you can deal with them accordingly as they appear. After all, in this dungeon, you’ve got enemies ranging from the 80 to 94 range and that’s a relative difference if you’re lower on the spectrum for your level.
To enter this secret dungeon, you’re going to want to make it to the end of the dungeon and head towards the north-corner of the map, in that area you will see a ladder that will take you down to the secret dungeon that you seek.
At the beginning of the dungeon, you will be facing against a number of killer wasps and Coral Devils, both of which don’t have much of a preference for ice-based attacks, so feel free to use that as you see fit when you come in to contact with these enemies. Eventually, you’re going to come across the very first room that has more than one exit and if you take the exit to your right, you will be able to continue on through the dungeon at a decent pace.
Moving on from this area, you will see plenty more of the combatants you’ve already face, but you will also come face to face with a creature that goes by the name of Hvitromr. Its main source of attack is to spit acid rain down onto you, but with a few good strikes using either a sword or a set of daggers, the snake-like creature will eventually fall to the floor. Not long after you’ve faced this creature, you will be introduced to one more room with a multitude of exits – so for this room you’re going to want to take the left exit to carry on your trek throughout the dungeon.
Carry on through the dungeon until you come across one more room with multiple exits and take the centre exit on the map to keep making some headway through this area. Just be aware that you’ll be coming up against Sea Devils – they’re just reskinned versions of Coral Devils, except they pack a bit more of a punch – but they still have the same weaknesses as the Coral Devils do.
Just after, you’re going to be fighting against a Gaiatoad, something that has a considerable amount of health and may take a little bit of time to actually vanquish this foe. Thankfully, it does have a weakness to polearms, so be sure to make the most of them when up against the Gaiatoad. Once he’s been slain, you’ll come to one last room with a selection of exits and for this one you’re going to want to take the centre exit again.
From here on out it’s a pretty straight path to the final boss, so just take things slow, defeat any enemies that come your way with their respective weaknesses and you will be going up against the boss in no time at all!
The boss for this dungeon is a Wyvern-like creature that goes by the name of the Manxom and it has a weakness to polearms, but firearms and greatswords won’t leave a single scratch on the Manxom, so it’s best to stay clear of those weapons; unless you’re looking for one serious challenge.
After the boss finally falls to your blade, you shall be rewarded in the form of the Gigas Bangle, a rather potent accessory that isn’t anything to snuff at for completing this secret dungeon.
Treasures on Each Floor
| Floor | Left | Straight | Right |
|---|---|---|---|
| 1 | Iron Shavings | ||
| 2 Branching Path |
Ether | ||
| 3 | Potion | Debased Banknote | Chrome Bit |
| 4 | Anklet of the Gods* | Hi-Elixir* | Hi-Elixir |
| 5 | Debased Silverpiece | ||
| 6 | Mega-Potion | ||
| 7 | Elixir | ||
| 8 Branching Path |
Megalixir | ||
| 9 | Phoenix Down | Hi-Potion | Rusted Bit |
| 10 Camp |
Mystic Circlet | Oracle Ascension Coin | Mythril Shaft |
| 11 | Mythril Shaft | ||
| 12 Branching Path |
Oracle Ascension Coin | ||
| 13 | Potion | Debased Coin | Iron Shavings |
| 14 | Hi-Elixir* | Hi-Potion | Tarot Card* |
| 15 | Mega-Potion | ||
| 16 Branching Path |
Megalixir | ||
| 17 | Debased Silverpiece | Ether | Chrome Bit |
| 18 | Elixir | Debased Banknote | Tarot Card |
| 19 | Rare Coin | ||
| 20 Camp |
Mighty Guard | ||
| 21 | Rare Coin | ||
| 22 | Blue Diamond Bracelet | ||
| 23 | Debased Banknote | ||
| 24 | Oracle Ascension Coin | ||
| 25 | Mega-Potion | ||
| 26 | Legatus Bangle* | ||
| 27 | Hi-Elixir | ||
| 28 | Megalixir | ||
| 29 | Hi-Elixir* | ||
| 30 Boss |
Gigas Bangle |
*Random Treasure
In regards to floors with branching paths the directions left, right, straight refer to when your back is to the entrance you entered from
Map
- See also: Crestholm Channels (Menace) Map
