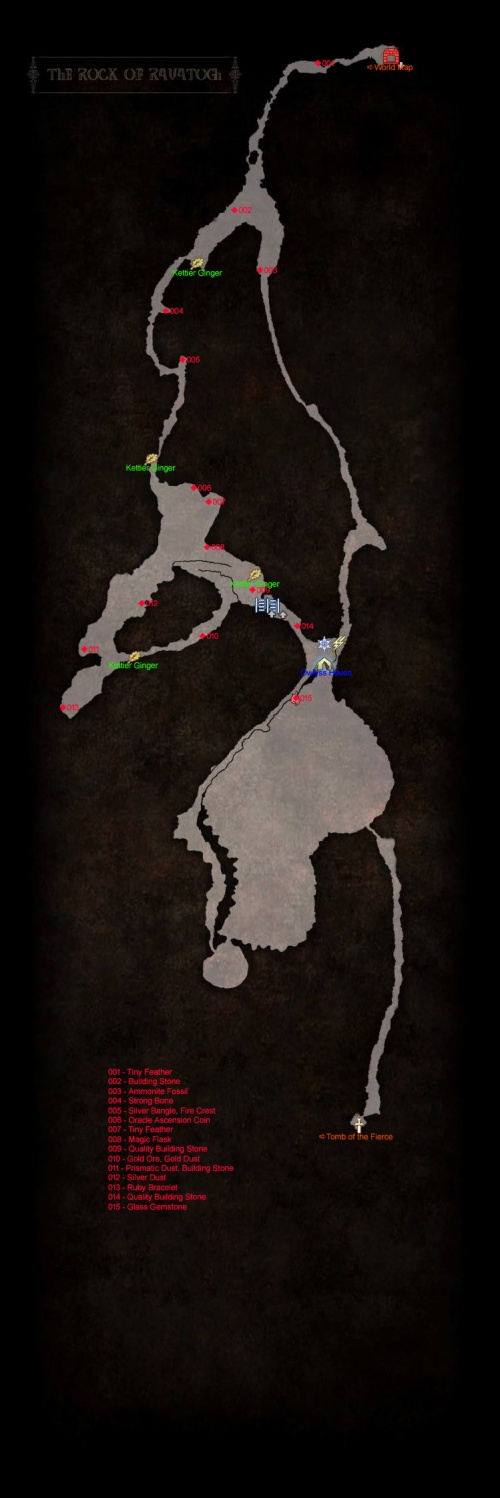
The Rock of Ravatogh
The Rock of Ravatogh is a Dungeon
Strategy Guide
Of all the dungeons located in the game, The Rock of Ravatogh is one of the only ones that focus solely on going vertical, rather than anything else. As a result of this the dungeon itself is fairly straight forward, with only a few extra pathways here and there to confuse the player/to locate new items spread about the place.
- Rewards: 4,000 XP
Once you arrive at the foot of the mountain, head straight up towards the dungeon and before too long you will come across one of two paths: east and west. You’re going to want to take the west path first of all; with the reason being that the east pathway is how you get back out of the dungeon a little faster and isn’t currently accessible until you conquer the dungeon. So, take the west path and be wary about how much of a slide the next few inclines are going to be.
When you’re running up these inclines you’re only going to be able to make so much distance before Noctis and the group will lose their footing, so be sure to take a break on the rocks from time to time. If you fail to do this every now and again you’re going to be sliding back down until Noctis lands on a flat surface and if you somehow make the mistake of missing every single one – like I did – you will slide all the way back to the start of the incline; a feat you don’t really want to have to do again. Trust me, after a while it becomes quite tedious!
Before too long you will make it to the second pathway that you’re going to want to go towards the east on. To the east you will come across a campsite that you can stop at for some quick food-related buffs if you’re no higher than late-level 20’s, but if you’re level 30 or over you’re really not going to need them for the upcoming boss fight. Just after the campsite you will come in contact with the fairly large flying creature: Zu!
There is actually a bounty out on Zu, so it might be wise to pick that bounty up at the nearby settlement before embarking on this dungeon; just so you can get an extra bit of cash to spend once you’re all done with the boss.
Zu has a considerable amount of health that can take a little while to chip away if you don’t weaken and stagger him first of all. To do this you’re going to want to target his talons, up until they finally break. After they break he will get knocked over and will give you the perfect opportunity to do some significant damage to him. Be aware that the boss doesn’t have any real weaknesses to speak of, so it’s best to simply take your best DPS weapon and keep striking at the boss until he gets back up or he’s defeated.
Around the boss fight area you will find a number of rest points that are best to be taken advantage of if you keep getting struck off guard by the boss. Of all the areas in the game that you fight bosses, this is one of the largest without a shadow of a doubt – make sure to use that to your advantage when you need a quick breather. Keep up the onslaught of attacks and before too long the beast shall be defeated and you will be rewarded thusly.
After the boss is finished with, to the southeast side of where you were you will find a rather narrow passageway, of which inside lies in wait the Mace of the Fierce; another one of the thirteen Royal Arms.
Map
- See also: The Rock of Ravatogh Map
